Photography is one area that I've invested a lot of time into. In an attempt to pass along some of the most important things I've learned, here are 10 tips to help take better DIY headshots.
1. Plan How You'll Use Your Photos: Posters? Business Cards? Headshots? Each of these traditionally require a different type of photo. For example, posters are portrait orientation including negative space for text, business cards and postcards are landscape orientation including negative space for text, and headshots are portrait or square orientation and should feature you and your instrument.


Knowing how you'll use your photos will allow you to plan your shots to have all of the necessary layouts to meet your goals.
2. Find Your Mood: All of the elements that go into your photo - what you wear, the lighting you use, where you are, the expression on your face - are for more than looking good; they all come together to create the mood of your photo. Deciding how you want the photo to feel can guide your decisions, so your photo can reflect who you are as an artist and what your work is like.
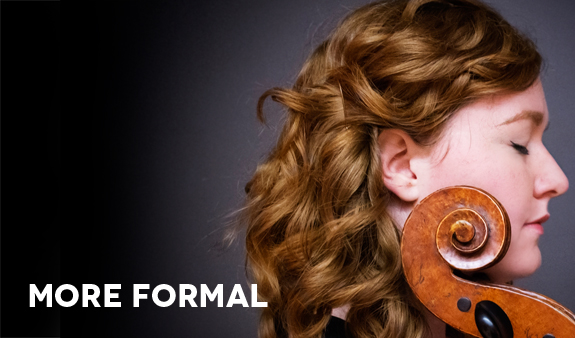
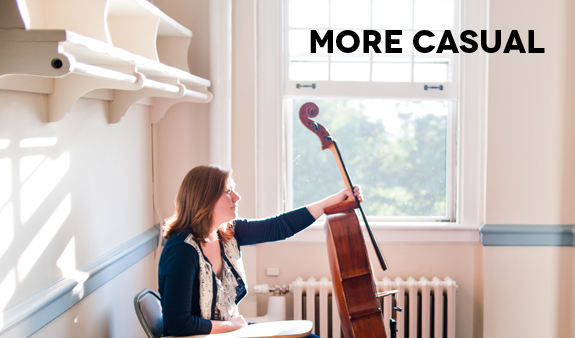
(Bottom photo by the amazing Kaitlin Moreno)
3. Photography Equipment: If you're a beginner to photography the two most important pieces of equipment you will need are 1) a camera with the highest resolution you have access to and 2) a tripod or friend to take your photos.
Resolution is important because it will limit how you can use your photos. If you only need your photos for internet use, you can get away with lower resolution, but, if you'd like to print concert posters, you will need a higher resolution camera.
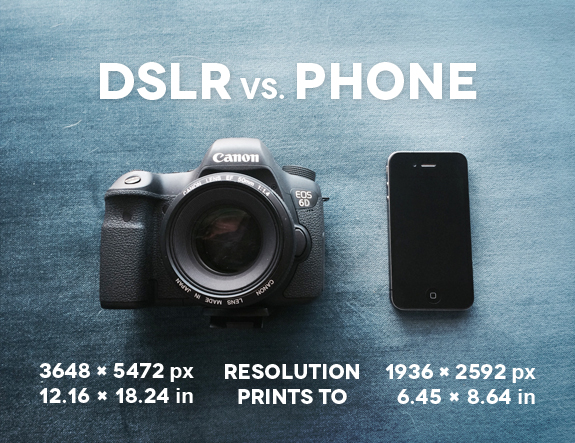
Obviously, expensive equipment can yield gorgeous results, but phone cameras and point-and-shoot cameras have improved tremendously over the years! The easiest/most affordable solution is to have a good friend take your photos with a point-and-shoot camera or your phone camera.
4. Experiment With Smiling: Not everyone looks best while smiling. Give yourself some options by taking photos with and without a smile. Remember, if you DO smile, avoid an awkward yearbook look by always smiling with your eyes too!
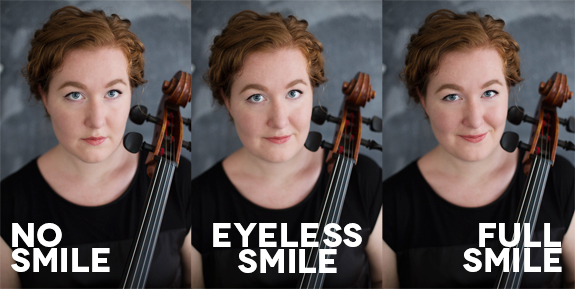
(click photo to view a larger version)
5. Consider Your Instrument: The advantage of showing your instrument is that viewers can immediately know what you do. BUT, be sure to maintain nice posture if you play in your photos. Sometimes that means playing an easy scale or miming your technique. Take care, because moments of transition while you play (maybe between a shift or during a breath) can result in distorted pictures with awkward posture.

(Photo from Shutterstock.com | Photo by the amazing Kaitlin Moreno)
6. Use Natural Light: While many professional headshots are taken indoors, the success of these photos is a result of professional lighting and professional level photography. For the rest of us mere mortals, natural light will greatly improve our chances for beautiful photos. Avoid direct sunlight because it can cause harsh shadows (plus, you'll be all squinty). Try to take your photos during the golden hour for best results.
7. Background Care: Busy backgrounds are bad for text. If you plan to add text to your photo, try to find an interesting, but simple background.

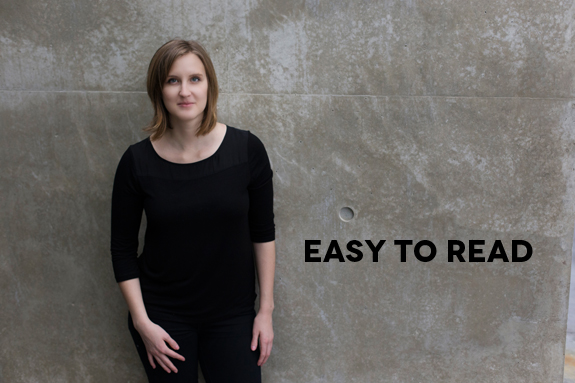
8. Account for Black and White: If you plan on using your headshot for concert programs, remember, programs aren't all printed in color! In fact, usually they're not. While color photos look best with well... nice colors, black and white photos look best based on contrast. Busy or low contrast areas in your photo might not look as good in black and white.
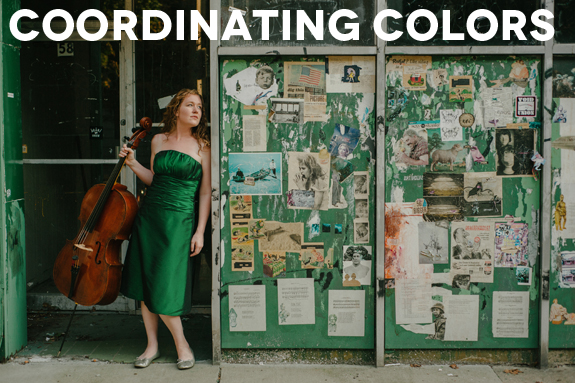
(Hover to See Black & White Version | Color photo by the amazing Kaitlin Moreno)
9. Take a Million Photos: I can't emphasize this one enough. Since digital photos are basically free, take as many as you can stand and weed out the bad ones later. You're much more likely to get "The Shot" if you have lots of options to choose from.
10. Edit Your Photos: The reality is, every professional photo you see has been edited at least a little. Though starting with a well lit photo with sharp focus is key, adding more contrast and saturation will make a huge difference for your pictures. Editing software ranges from free (try Picasa) to very expensive (Photoshop is extremely powerful) to somewhere in between (Afterlight is a great iPhone app and Pixelmator is like Photoshop light).
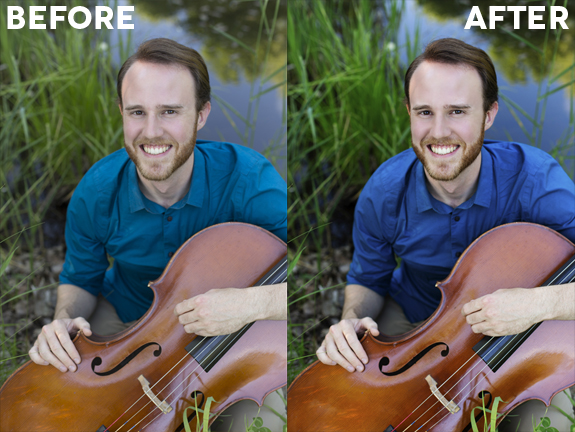
The world of photography is unbelievably expansive - I mean, it is it's own artform - and it can be easy to get overwhelmed. Frankly, that's why professional photographers are worth every penny they charge! But, with some effort, it is possible to do it yourself.
If you have any questions or advice to add, feel free to leave them in the comments section below!
All photos in this post were taken by Jennifer Bewerse unless otherwise noted. Special thanks to Rachel Beetz, Dustin Donahue, and Bryan Hayslett for agreeing to make photo appearances for this post!

great advice, thanks!
ReplyDeleteThis is ultimately the most important criteria and you might be surprised how quickly you are drawn to one style over another. theatrical headshots
ReplyDeleteStarting and maintaining a home business enterprise is a bold move. Home businesses can be immensely successful if you know how to maintain your businesses affairs in the right way. This article will cover some of the essentials you need to consider, to ensure the growth, success and profitability of your online business Business Portrait
ReplyDeleteGreat readiing your blog post
ReplyDelete