28.10.14

Teaching Contracts

Teaching Contracts Title

After a great comment thread on Facebook initiated by cellist Marie Sinco Warren, I realized I'm not the only one out there who feels a little baffled by teaching contracts. What should I put in there? How official does it need to be? Am I missing something?

Marie suggested a post about it all, and I thought it would be fun to peek at a few other musicians' contracts. So, three very generous teaching artists below have volunteered to share their contracts and some info about their teaching contract experience.

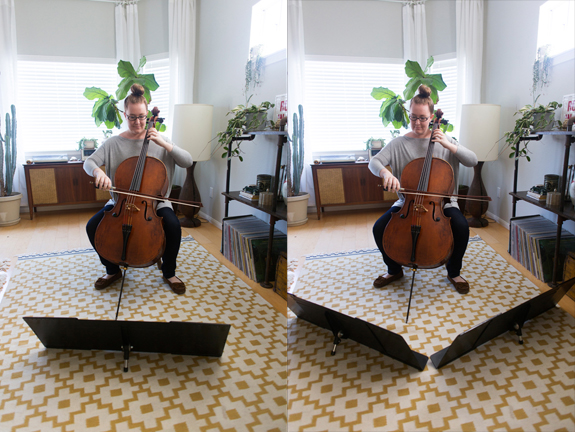
Justin Dougherty teaches cello and chamber music to private students in middle and high school, as well as at two universities on an adjunct basis. He's been teaching privately since 2008 (when he finished my undergraduate degree), and recently organized his studio into a full time job in 2012.

"I've been using contracts for performances since 2010 to protect both the presenters' interests and my own. It makes it much easier to organize one's professional obligations when all things are written in concrete terms, with no ambiguity. My private studio contract isn't so much a contract as a set of clearly defined policies which seem strict on the surface, but really only lay out what happens in the worst case scenario."

What's the most important part of your teaching contract?
"The most important part of my contract deals with showing up. What I think many non-musicians don't think about is what they are paying for in a music lesson. It's not just the instruction (one's expertise), which is truly the largest factor, but also the time: a parent/student is paying me to reserve my time for them. In return for this reservation, I will show up and offer my expertise. My contract guarantees that the student will also show up during their reserved time, but if they don't, I am still compensated for it."

What policy change has made the biggest impact on your studio?
I recently changed my cancellation policy because my former policy had many loopholes and situational considerations. It was too case-by-case to be an effective policy. Now, I have a "no refunds or credits for cancellations of any kind" policy. In this policy, I've set aside eight hours each weekend for rescheduled lessons, and if a student must cancel their regularly scheduled lesson for any reason, they have 30 days to make up the cancelled lesson… If [parents] are unable to find a reschedule time over 30 days, they lose their tuition. So far, there have been no problems with this policy, and many parents find it freeing to have options and possibilities.

Other contract thoughts or advice?
If you think it (a situation) may eventually be a problem, add it to your contract. If you are fearful that a student may not bring their instrument to their lesson (gosh, why wouldn't they?!), make sure you add it to your contract. If you think that a parent may try to pay you in Euros and you aren't so keen on that, make sure to define payment type. Update your contract regularly (yearly, at least) to either trim the fat from the contract or to add new policies to address ongoing issues that you've been having. Overall, remember: the contract protects both you AND your client/student/student's parent from abuse.

Check out Justin's Teaching Contract Here


Eric Moore has been teaching cello privately since 2005, full-time since 2010. Currently he teaches weekly lessons out of his home studio but has also taught in other locations and through local music shops.

"I started using a contract in 2008 when I started to have students who would cancel on the same day."

What's the most important part of your teaching contract?
"Clarity. Whether your teaching policies are flexible or rigid, being clear about your normal expectations and clear about foreseeable contingencies is important.

Of my policies, the expectations about absence, extended absence and leaving the studio are the most important to my business. Since teaching accounts for most of my income, my students' payments are budgeted as though I were on a salary. I've started to think about this guaranteed income like rent - students use out my available time slots like they would rent an apartment. Leaving for a vacation doesn't get a person out of a weeks' worth of apartment rent. Similarly, two weeks' notice for me to fill the time slot is reasonable - that's income I expected to have and I need time to replace the tenant of that time slot."

Has having a teaching contract helped you get out of tricky situations? Prevented them?
"Over months or years with students (and parents) we get to know them personally and it can be tough when they email and ask for an exception to the policies. Rather than hem and haw because you feel guilty, having policies allows you to email back 'I'm sorry, I can't do that as per my policies but I hope they have a great time doing [whatever]! See you next week!'"

What policy change has made the biggest impact on your studio?
"On a practical level, monthly tuition (rather than weekly) is awesome and I go so far as to keep it the same regardless of the number of weeks. Everyone knows they're going to get a lesson a week and that over a year my monthly rate is a tad cheaper than my "hourly" rate. I use Square Cash (no transaction fees and my students get points for using their debit cards) and the amount is the same every month. I used to have to calculate out how many weeks there were in the month and ask for that amount. This is much faster."

Other contract thoughts or advice?
"As musicians, it is so easy to get into the mentality that we are somehow subservient to our students (or their parents) who are essentially patrons or donors. Not true. We are a providing a service to them and as such we need not feel shy or timid or awkward about being business people.

That being said, my policies are very cut & dry and out of context could sound mean or heartless. I am, on the other hand, very much a goofball and I joke around constantly during lessons. The policies enable me to have that distinction and, ultimately, are just there as a worst-case-scenario for chronic problems."

Check out Eric's Teaching Contract Here


Ariana Warren teaches both at her home studio and at a private school. All of her teaching is through one on one lessons on clarinet, saxophone, and flute.

"I started using a contract because it's really hard to get people to pay on time and cancel lessons in a timely manner. I ask that they pay up front for the month so that there is more incentive to give me notice when they will be away. If I have plenty of notice for an absence I don't have them pay for that week when paying the month's bill."

What's the most important part of your teaching contract?
"Money and cancellation policy."

Has having a teaching contract helped you get out of tricky situations? Prevented them?
"Not yet--parents are still bad about paying on time, particularly at the private school since I rarely see the parents. The kids stay after school and go to aftercare, so their parents aren't around to pester."

Check out Ariana's Teaching Contract Here


Aren't these three the best? A HUGE thank you to Justin, Eric, and Ariana for sharing their experience. If you've had any helpful contract experiences, please please share them in the comments below!

Disclaimer: This post is not a substitute for seeking legal advice from a licensed professional. To be sure your contract is legally sound and meets your business needs, please do hire a professional.

14.10.14

When to Turn the Page

No Page Turn Title

Sometimes it can feel like finding the right spot to turn pages is a labyrinthian task of negotiations, especially if a publisher or composer hasn't had the chance to plan page turns or if you've decided to play from the score.

When rests are especially sparse, page turns drive me absolutely batty! The only spot I have for turning is during this amazing dramatic pause? No!! I want to feel the physicality of the silence, not the whoosh of moving paper!

As an exercise in illustrating how strangely complicated the process can be, I've drawn up a fun flow chart for choosing when to turn your page...

Page Turn Flow Chart

So, when are you turning your page? Any others with page turn pet peeves out there??

30.9.14

Quick + Easy Bio Generator

Can we all agree? Writing bios is the worst. Not only is there that nagging feeling of having done nothing important, but there's the terrible sense of "I know what I need to say to make myself seem impressive, but that doesn't really represent me as an artist."

Bio Generator Title

So let's just all skip it. Here's a bio generator that will get the job done without all the BS. Just fill in the following text and call it a day! (Tip: Do not over think this. We're talking "first word that pops into your head" here.)

Please please please, if you make a bio, come back and share it here in the comments. We all thank you in advance.


QUICK & EASY BIO GENERATOR

YOUR FIRST NAME
YOUR LAST NAME
ADJECTIVE
YOUR OCCUPATION I.E. "CELLIST" "COMPOSER" "PRESENTER" "PERFORMER"
PRESTIGIOUS PUBLICATION
ADJECTIVE
ADJECTIVE
VERB ENDING IN "ING"
NOUN
ADJECTIVE
VERB FOR YOUR WORK ENDING IN "ER" I.E. "PERFORMER" "COMPOSER" "PRESENTER"
ADJECTIVE
PLACE
COLOR
NOUN
SOUND
NOUN
PUNCTUATION I.E. !?
YEAR
CELEBRITY
ADJECTIVE
PLURAL NOUN
OCCUPATION
VERB ENDING IN "ING"
ADVERB
VERB ENDING IN "ING"
YOUR GENDER PREFERENCE PRONOUN, HIS OR HER
ADJECTIVE
NOUN

Thank you to MadTakes for providing the tool for our new fabulous bios!!

23.9.14

Rethinking the Repeat

A classic rule for playing music with a repeat: do it differently the second time.

Frankly, I've found this bit of musical advice completely unhelpful!
1. It’s impossible NOT to do it differently the second time
2. "Different" isn't good in itself, and different for difference's sake is meaningless

Repeats

I'd like to propose another way of thinking about the repeat. Instead of treating repeated music as “the same thing, but different,” interpret the repeat using the emotional baggage your music would have accumulated the first time through.

To demonstrate what I'm getting at, consider speech. How would you communicate differently if you had to repeat yourself?

"I can't believe you did that! I can't believe you did that!!"
A toddler screaming "no no NO NO NOO!"

Whether it's a heavier emphasis on "believe" or a crescendo on "no," when we repeat ourselves in speech we use timing, dynamics, and articulation to communicate our emotions and intentions. Repetition is a device for communication, not a superficial chance to hear ourselves again.

Repeats_4

To put it another way, performing with emotional baggage creates an emotional narrative.

The possibilities for that narrative can be endless, and the repeat can become part of a larger arc instead of just another possible interpretation. Has the wailing grief subsided into shocked numbness? Has the playfulness taken on a more mischievous tone, trying to toy with the listener instead of play with them? Instead of wondering how the music can sound different, ask how you can make the music sound like an authentic reaction.

Repeating can be a chance for us to dive more deeply into our music's narrative, to explore nuance, and reveal deeper emotional understanding.

16.9.14

Journaling for Musicians

Growing up, I was never a person who could maintain a journal. I still have the one I attempted; I got about four entries in, each of which I printed out on my dot printer - the kind you had to rip the edges off of - and taped in using my Lisa Frank tape (I was super cool).

I never really understood what was so great about journaling.

Journaling Title

This year I think I finally got it.

Journaling isn't about recording your best ideas, it's about capturing all of your ideas and getting them out of your head so you have room for new ones. When you're stuck, journals become idea machines, not just for the ideas you've already written down, but for the new ideas the old ones inspire. It's kind of magical.

"You can't use up creativity. The more you use, the more you have" - Maya Angelou

Journaling_2_1

I use my journal to list out concert ideas, blog ideas, things I want to do online, and notes on music in general. It's all very messy and I try not to worry about whether anything I write is worth recording.

Journaling_3_1

To keep myself organized, I hole-punch a specific line of my book to coordinate with its subject, then color the edge with the coordinating color. (TIP: If you make your own hole-punch index system, do it in reverse of the above. Punch holes in all of the lines EXCEPT the coordinating subject. You'll end up with little colored tabs instead of colored holes. Live and learn.)

Journaling_4_1

Now, my journal goes everywhere with me and I credit it with a great deal of the surge in creative energies I've been feeling over the past several months. Highly recommend.

Any other music journalers out there?

9.9.14

Knitting Vs. Sculpting

How does the saying go? "There are two kinds of people in the world: those who divide the world into two kinds of people, and those who don't" – Robert Benchley

Knitting Sculpting Title

Well, today I'm going to fall into the former category along with Karl Paulnack, dean of the School of Music at Ithaca College. I met him when he was the Director of the Music Division at Boston Conservatory, and he taught me a metaphor I've been using ever since.

You're Either a Knitter or a Sculpter


Knitting Sculpting_3

Knitting is a step-by-step process. Each stitch must be perfect before the knitter can move on, and mistakes cause ripple effects out into the rest of the work. Knitters can't to skip to the end or bounce to another part of the project, they work one stitch at a time until they're finished.

Workers who are "knitters" start at the beginning and deal with each section or obstacle as it arises. In music, these are the people who learn rehearsal A before they can go on to B. They perfect the first phrase before dealing with the next and are inclined to start the metronome at its lowest setting, working their way click by click to the final tempo. They thrive on detail and the micro-level.

At their worst, the knitter is all nuance and no vision, or can't find their way to the end a project. At their best, they're the master of detail and patience.

Knitting Sculpting_2

Sculptors begin with a chunk of clay or rock. From the whole, they slowly chip away, forming details layer by layer. They move around their medium, revealing the whole as they refine the edges of their work. Working on one section without stepping back to examine the whole results in distortions and imbalances, so the sculptor always has their eye on the gestalt.

Workers who are "sculptors" begin each project with an overview to evaluate all challenges and get a sense of the final result. In music, they're likely to play through a piece, deal with small issues, then run through the piece again to see how their solution fit into the larger context. They drill down from the whole into its details and always place musical elements in a large scale.

At their worst, sculptors are full of grand gestures without the substance to back them up, or they end up with a sloppy final product. At their best, they're masters of form and vision.

Knitting Sculpting_4 small

In reality, none of us are only knitters or only sculptors - we land somewhere in between, but might lean one way or the other. Depending on what's being asked of us or what phase of a project we're in, we might switch between the two styles.

But, because music is so often collaborative, it's still helpful to know which way you lean. For example, I'm almost always a knitter, so, left to my own devices, I'll drill a detail into the ground until. It. Is. Perfect. That's fine in my personal practice, but can be soul-sucking for my sculptor collaborators. I'm always careful to keep an eye out for the glazed over "can we PLEASE move on!" look from my partners in music - that's when I know it's time to switch to sculpting!

Being aware of my penchant for knitting is also helpful when I start new projects. I know if I need to learn a piece of music quickly, I might not have time to knit - if I do, I'll probably sound rough at the end of the piece. Instead, I know I'm going to have to let go of a few details and spend some time sculpting.

In the end, it's best to be able to knit and sculpt, and either method can be learned with a little targeted effort. Both styles are useful in different settings, and both end in beautiful art.

So which are you? Knitter or sculpter?

2.9.14

Three Page Score Binding

Any musician playing from photocopies or printed PDFs will rapidly outgrow the basic score binding method. Many pieces simply do not include rests for page turns! In those cases, having three pages on the stand may be the best solution.

Three Page Binding Title

I remember the first couple of times I attempted to assemble my own trifold scores. Assembling a score with trifolds isn't hard, but I managed to make a few very awkward scores before I ironed out the kinks to my method.

So that you can skip past the awkward score phase (think of it as the teen years of do-it-yourself score binding), I've made a video tutorial that will teach you exactly how to add a third page to your scores. As a bonus, there's also an alternative trifold page turn solution that can save you paper.


See? Totally doable and very handy!

If you're a performer who likes to invest in spiral binding for their scores, you can still have trifolds. Just trim about 1/4 inch off the edge of your trifold page, so it can be tucked in without bumping into the spiral binding.


If you have any score binding questions, requests, or additional tips be sure to leave them in the comments!

26.8.14

The Illusion of Ease

Ease and effortlessness are essential to so much creative work. From an effortless bow change to an oil painting that masks all brush strokes, ease allows other emotions, characteristics, ideas, and experiences to hold central focus.

But ease is almost always an illusion.

Illusion of Ease Title

For example, I started The Endpin in May, 2014. To a visitor it might look as if I were able to launch a blog with a custom design, publish posts that have been widely shared (PS thank you for that!!), use original photography, and cover a variety of relevant topics in four months.

In reality, I've blogged about other topics for 5 years, I've taken e-courses on blogging, I've learned rudimentary web design over about 5 years, and my first blog looked like crap. I've steadily improved my photography over 4 years, I've been interested in and actively studying graphic design for about 3 years, and I've worked part-time as UCSD Music Department's Promotions Graphic Designer for 2 years. I thought about starting a music blog for ages before deciding I had information worth sharing, then I journaled blog topic ideas for several months before writing my first post. Each post is based on an idea I've considered at length (sometimes for years) and can take anywhere from 3-14 hours to photograph, write, and edit.

Illusion of Ease small

I don't want readers to feel my efforts because it would distract from the point of my posts. (And this post is absolutely not to show off how hard I work - the cult of "I am so busy" ISN'T the solution to the illusion of ease.) But, it's important to know that my work isn't the result of a first try. I've experimented with, learned about, mulled over, and (to be honest) failed at so many things to get to this point.

If someone else were interested in creating a similar blog, it would take a similar amount of effort and accumulated experience.

Working towards our creative goals is hard, and when we buy into the illusion of ease we risk inviting floods self-doubt and criticism into our creative processes. While self-doubt and criticism are completely unavoidable - they're feelings every artist learns to manage over time - they become problematic when the feelings are so consuming that they overwhelm our efforts. We quit.

Ira Glass articulates it beautifully in this interview by Current TV
(animated by David Shiyang Liu).


Understanding that, as a rule, good things take effort normalizes the effort each of us experience when we try something new. If we know that achievement takes time, no matter how easy it looks, we can move from "I'm not good at ___" to "I'm not good at ___ YET"

Grappling with the illusion of ease means holding two truths simultaneously. We must both experience creative works as they're intended (usually without a projection of effort) AND cultivate an understanding of the effort all creative endeavors require.

19.8.14

8 Free Resources for DIY Websites

Website Resources Header

Generally, life as a musician is built on a shoestring budget. And, while there are many affordable website design options out there, nothing beats free. Below are the 8 Customizable, High Quality, and FREE Resources I personally use to create my cello website.

Free Service Images blogger

1. Blogger

Yes, it's designed as a blogging platform, but I've found blogger to be so easy to customize that I love using it for my website. An added bonus, its massive user base has resulted in an endless supply of tutorials. If you'd like to do something with it, there are probably detailed instructions out there already. An additional advantage is that, since it's hosted by Google, blogger servers rarely if ever go down - you won't have to worry about your website breaking.

See it in action || Other options: Wordpress

Free Service Images flickr

2. Flickr

If you'd like to add images to your website (and you probably should), you'll need a service to host them. While, there are many many options out there, I use flickr because it maintains the high quality of my photos and is so easy to use.

Other options: Photobucket, Picasa (Google+)

Free Service Images dropbox

3. Dropbox

If you'd like allow visitors to access files on your website (maybe an EPK, different versions of your bio, or free downloads), Dropbox is an easy file hosting service. Also, if you're managing a website with others (say, as part of an ensemble), Dropbox is build to be easily sharable and collaborative.

Other options: Google Drive

Free Service Images youtube

4. YouTube

Ubiquitous on the internet, YouTube is my go-to host for videos. It used to have a lower visual quality than Vimeo, but has massively improved in recent years. The added bonus of a very active community (don't read the comments though!) makes this my preferred video resource.

See it in action || Other options: Vimeo

Free Service Images soundcloud

5. SoundCloud

To be honest, I haven't delved completely into everything soundcloud has to offer, but I love that you can customize the embeddable audio player to blend seamlessly into your web design.

See it in action || Other Options: Bandcamp

Free Service Images calendar

6. Google Calendar

Most musicians create their online calendar by simply adding text to a webpage, but I find that very difficult to update - I always forget! For me, the best solution is to embed a google calendar (which I already used for all of my scheduling) into my website. When I add a calendar to my personal account, it automatically updates my website. This solution has the added bonus of doubling as a "Past Concerts" page.

See it in action

Free Service Images mailchimp

7. MailChimp

When I first started using MailChimp for my newsletters, I really appreciated how easy it was to use. Even more impressive (though admittedly not quite as easy) is how seamlessly I can embed the MailChimp newsletter sign up form onto my website. It's practically impossible to tell it's an external service at all!

See it in action

Free Service Images analytics

8. Google Analytics

I use Google Analytics to learn how to improve to my website. From how many people visit to where they come from, having a good analytics system in place helps me decide where to effectively invest my efforts.

By no means breaking news, together these free services provide me with everything I need to have a self sustaining web presence. If you have other services you use and love, please leave them in the comments below!

13.8.14

Extra Low Music Stand

Low Stand Title

One of my great enduring struggles as a cellist has been the traditional music stand. Yes, it holds my music very well, but it also creates a giant blockade. Meet the Dead Zone.

low stand

I hate the dead zone. It visually (and to a lesser extent acoustically) blocks all of the most interesting sounds the cello can make! So while learning Lachenmann's Pression, which specifically requires the cellist/cello to be visible, I began a quest for the perfect low music stand. And I found it.

low stand_2

Pictured above is a Manhasset Table Top Stand, which, it just so happens, also works very well on the floor. The stand is stable, looks nice, and is completely unobtrusive.

In the interest of full disclosure, there are three downsides to a stand this low:
1) you have to know the piece well and have good enough vision for the distance
2) it's difficult to see collaborators (ie conductors or chamber music partners)
3) page turns are difficult at that distance

But if you add Stand-Out stand extenders, you should have no problem fitting your music without needing page turns.

low stand expanded

With extenders, you can easily fit 8 pages of music (probably more if you consider your page size carefully). When collapsed, two stands with their extenders fit in carry-on luggage and can be held with one hand.


All together the two stands and extenders will run you about $90. There are cheaper options out there, but I haven't found anything that's as durable, nice looking, and easy to transport.

Cellists, get excited.

7.8.14

DIY Concert Posters

Poster Title

Over the past two years, I've been in full-on visual promotions mode as the Productions Research Assistant for the UC San Diego Music Department. Basically my job has been to make digital and printable posters/flyers.

Do it yourself promotions are actually pretty darn easy, but the learning curve for poster printing basics can be pretty confusing. So, from someone who's been through it (often the hard way), here are the printing basics you need to make your own professional looking posters.

Posters copy_1

*Parts of this post assume access to some kind of image-making software like Pixelmator or Photoshop

1. Image Resolution: When creating your poster image for print, always set your resolution to 300ppi (pixels per inch). That's the standard resolution for print. Resolution for digital posters (images online) can be 72ppi, a much lower resolution.

2. Paper Size: While 8.5x11 paper is the easiest to do yourself, using 8.5x14 or 11x17 paper will give you a more custom (and thus more professional) looking poster. I almost always make my posters on 8.5x14 paper, then get them printed at a local office supply store on a laser printer with nice quality paper.

rgb cmyk

3. CMYK vs RGB: Printed images should always be made using CMYK color settings - pigment based colors that will translate to printers with high fidelity. Digital pictures should use RGB settings, which are colors based on light. If you mix up the two color settings, you'll get images that don't look how you intended them. For example, in the photo above you can see how a CMYK image looks faded compared to an RGB image when viewed on your computer screen.

Posters_5_1

4. Full Bleed: When an image goes all the way to the edge of the paper it's called "full bleed." Full bleed is a kind of illusion because printers can't actually print to the edge of paper! To get the full bleed effect, you have to incorporate extra image around the perimeter of your design, called the bleed, then crop your poster.

Posters_6_1

As a general rule, always add 0.25 inches of bleed to your design, then use a paper cutter to cut off the excess edge. If you have a program like InDesign, you can even add crop marks to show you exactly where to cut.

5. Image Rights: When you're making a poster, it can be tempting to grab the first great image you see off of a google image search, but that image doesn't belong to you. Always get permission to use another artist's image, or better yet, make your own!

Posters_1 copy_1

It might all seem like overly complicated jargon at first, but these basics can become second nature in no time. Depending on the software you use, solutions and tutorials are usually just a web search away. In the end, it's pretty simple to up your promotions game and get butts in your concert seats.

30.7.14

The Gigging Triangle

Gigs. If you're a working musician (or most any creative for that matter), gigs are probably a significant source of your income and career. As a result, we've all taken gigs that were soul-sucking, felt like a waste of our talents, or even ones that ended up costing more than they paid.

Gig Triangle

The Gigging Triangle is basically a tool that uses three gig characteristics to help avoid those soul-sucking-waste-of-talent-costing-me-money gigs that, over time, cause more harm than good.

Break It Down

1. Money: Probably one of the most concrete parts of the triangle - does it pay? Always remember to include costs in this calculation! Will you be missing other gigs? Travel costs? Will the time you spend on this project be more profitable if you spend it doing something else?
2. Fun: Maybe it's colleagues you love or an activity you can't get enough of - this part of the triangle includes anything that just makes you happy. I suggest "subtracting" from this category if the gig includes activities you specifically hate.
3. Reward: This is probably the most personal, abstract, and, frankly, tricky category on the triangle. Rewards can either be artistic or career related, will be different for everyone, and will change during different points of your career. Examples might be performing a piece you've always wanted to learn, getting reviewed, working with an important person in your field, or playing in an important venue.

While we can all survive a bad gig every once in a while, the reality is that working for just money, just fun, or just reward isn't sustainable. Also true, unfortunately, is that dream gigs (the ones that are fun, rewarding, and pay) can be pretty rare.

The gigging triangle is about making sustainable decisions, not perfect ones. The goal is to only take gigs that fulfill at least two of the three categories.


Four Scenarios:

1. Money + Fun + Reward = You are super lucky! Take the job and hang onto it with your life!
2. Money + Fun = Might not be the most satisfying job in the world, but it will pay the bills and make you laugh.
3. Money + Reward = It might be a bit of a slog, but you'll make your rent and build career capital.
4. Reward + Fun = You'll have a great time and progress your career, it's not going to pay the bills, but still a good investment!

I've been trying out this method for about a year, and, while I've definitely still taken several gigs that didn't work out well, I'm taking fewer gigs for money desperation or because I think I "should," and I'm saving my time for the work that will sustain my career. I'll take the progress.

The Gigging Triangle will never be an ideal predictor for the perfect gig, but it is an excellent tool for learning about what works and doesn't so we can make better choices in the future.

But it's just one method! How do you decide which gigs to take?

22.7.14

10 Tips for DIY Headshots

One of my top goals as a working musician is to learn skills that give me financial and artistic independence. I don't always have tons of money, but I have plenty of elbow grease!


Photography is one area that I've invested a lot of time into. In an attempt to pass along some of the most important things I've learned, here are 10 tips to help take better DIY headshots.

1. Plan How You'll Use Your Photos: Posters? Business Cards? Headshots? Each of these traditionally require a different type of photo. For example, posters are portrait orientation including negative space for text, business cards and postcards are landscape orientation including negative space for text, and headshots are portrait or square orientation and should feature you and your instrument.


Knowing how you'll use your photos will allow you to plan your shots to have all of the necessary layouts to meet your goals.

2. Find Your Mood: All of the elements that go into your photo - what you wear, the lighting you use, where you are, the expression on your face - are for more than looking good; they all come together to create the mood of your photo. Deciding how you want the photo to feel can guide your decisions, so your photo can reflect who you are as an artist and what your work is like.

Formal Photo
Casual Photo
(Bottom photo by the amazing Kaitlin Moreno)

3. Photography Equipment: If you're a beginner to photography the two most important pieces of equipment you will need are 1) a camera with the highest resolution you have access to and 2) a tripod or friend to take your photos.

Resolution is important because it will limit how you can use your photos. If you only need your photos for internet use, you can get away with lower resolution, but, if you'd like to print concert posters, you will need a higher resolution camera.

Equipment

Obviously, expensive equipment can yield gorgeous results, but phone cameras and point-and-shoot cameras have improved tremendously over the years! The easiest/most affordable solution is to have a good friend take your photos with a point-and-shoot camera or your phone camera.

4. Experiment With Smiling: Not everyone looks best while smiling. Give yourself some options by taking photos with and without a smile. Remember, if you DO smile, avoid an awkward yearbook look by always smiling with your eyes too!

Smile Chart
(click photo to view a larger version)

5. Consider Your Instrument: The advantage of showing your instrument is that viewers can immediately know what you do. BUT, be sure to maintain nice posture if you play in your photos. Sometimes that means playing an easy scale or miming your technique. Take care, because moments of transition while you play (maybe between a shift or during a breath) can result in distorted pictures with awkward posture.


(Photo from Shutterstock.com | Photo by the amazing Kaitlin Moreno)

6. Use Natural Light: While many professional headshots are taken indoors, the success of these photos is a result of professional lighting and professional level photography. For the rest of us mere mortals, natural light will greatly improve our chances for beautiful photos. Avoid direct sunlight because it can cause harsh shadows (plus, you'll be all squinty). Try to take your photos during the golden hour for best results.

7. Background Care: Busy backgrounds are bad for text. If you plan to add text to your photo, try to find an interesting, but simple background.

Hard to Read BackgroundEasy to Read Background

8. Account for Black and White: If you plan on using your headshot for concert programs, remember, programs aren't all printed in color! In fact, usually they're not. While color photos look best with well... nice colors, black and white photos look best based on contrast. Busy or low contrast areas in your photo might not look as good in black and white.

Color and Black and White
(Hover to See Black & White Version | Color photo by the amazing Kaitlin Moreno)

9. Take a Million Photos: I can't emphasize this one enough. Since digital photos are basically free, take as many as you can stand and weed out the bad ones later. You're much more likely to get "The Shot" if you have lots of options to choose from.

10. Edit Your Photos: The reality is, every professional photo you see has been edited at least a little. Though starting with a well lit photo with sharp focus is key, adding more contrast and saturation will make a huge difference for your pictures. Editing software ranges from free (try Picasa) to very expensive (Photoshop is extremely powerful) to somewhere in between (Afterlight is a great iPhone app and Pixelmator is like Photoshop light).

Before After Edit Headshots

The world of photography is unbelievably expansive - I mean, it is it's own artform - and it can be easy to get overwhelmed. Frankly, that's why professional photographers are worth every penny they charge! But, with some effort, it is possible to do it yourself.

If you have any questions or advice to add, feel free to leave them in the comments section below!

All photos in this post were taken by Jennifer Bewerse unless otherwise noted. Special thanks to Rachel Beetz, Dustin Donahue, and Bryan Hayslett for agreeing to make photo appearances for this post!