22.7.14

10 Tips for DIY Headshots

One of my top goals as a working musician is to learn skills that give me financial and artistic independence. I don't always have tons of money, but I have plenty of elbow grease!


Photography is one area that I've invested a lot of time into. In an attempt to pass along some of the most important things I've learned, here are 10 tips to help take better DIY headshots.

1. Plan How You'll Use Your Photos: Posters? Business Cards? Headshots? Each of these traditionally require a different type of photo. For example, posters are portrait orientation including negative space for text, business cards and postcards are landscape orientation including negative space for text, and headshots are portrait or square orientation and should feature you and your instrument.


Knowing how you'll use your photos will allow you to plan your shots to have all of the necessary layouts to meet your goals.

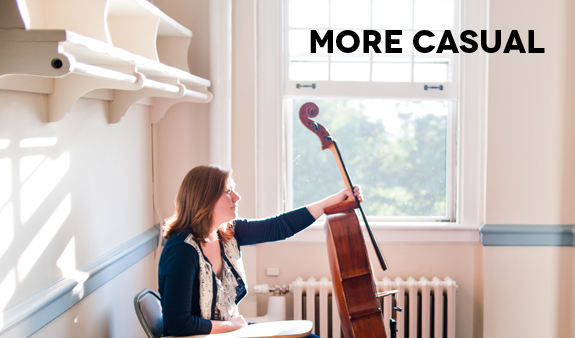
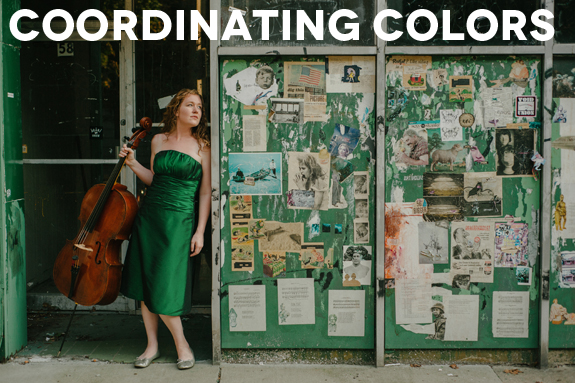
2. Find Your Mood: All of the elements that go into your photo - what you wear, the lighting you use, where you are, the expression on your face - are for more than looking good; they all come together to create the mood of your photo. Deciding how you want the photo to feel can guide your decisions, so your photo can reflect who you are as an artist and what your work is like.

Formal Photo
Casual Photo
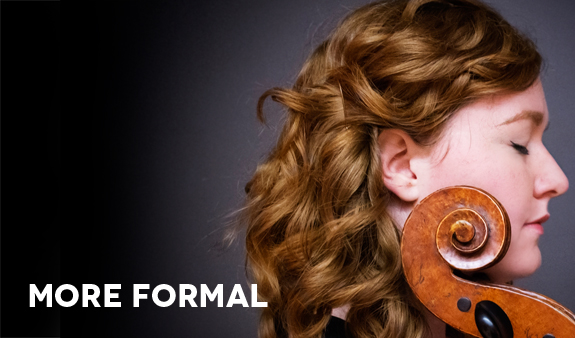
(Bottom photo by the amazing Kaitlin Moreno)

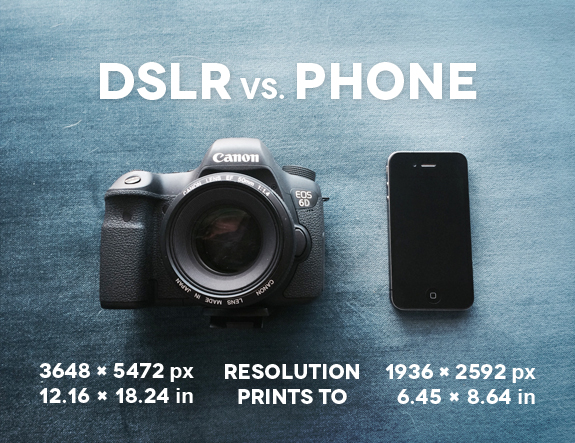
3. Photography Equipment: If you're a beginner to photography the two most important pieces of equipment you will need are 1) a camera with the highest resolution you have access to and 2) a tripod or friend to take your photos.

Resolution is important because it will limit how you can use your photos. If you only need your photos for internet use, you can get away with lower resolution, but, if you'd like to print concert posters, you will need a higher resolution camera.

Equipment

Obviously, expensive equipment can yield gorgeous results, but phone cameras and point-and-shoot cameras have improved tremendously over the years! The easiest/most affordable solution is to have a good friend take your photos with a point-and-shoot camera or your phone camera.

4. Experiment With Smiling: Not everyone looks best while smiling. Give yourself some options by taking photos with and without a smile. Remember, if you DO smile, avoid an awkward yearbook look by always smiling with your eyes too!

Smile Chart
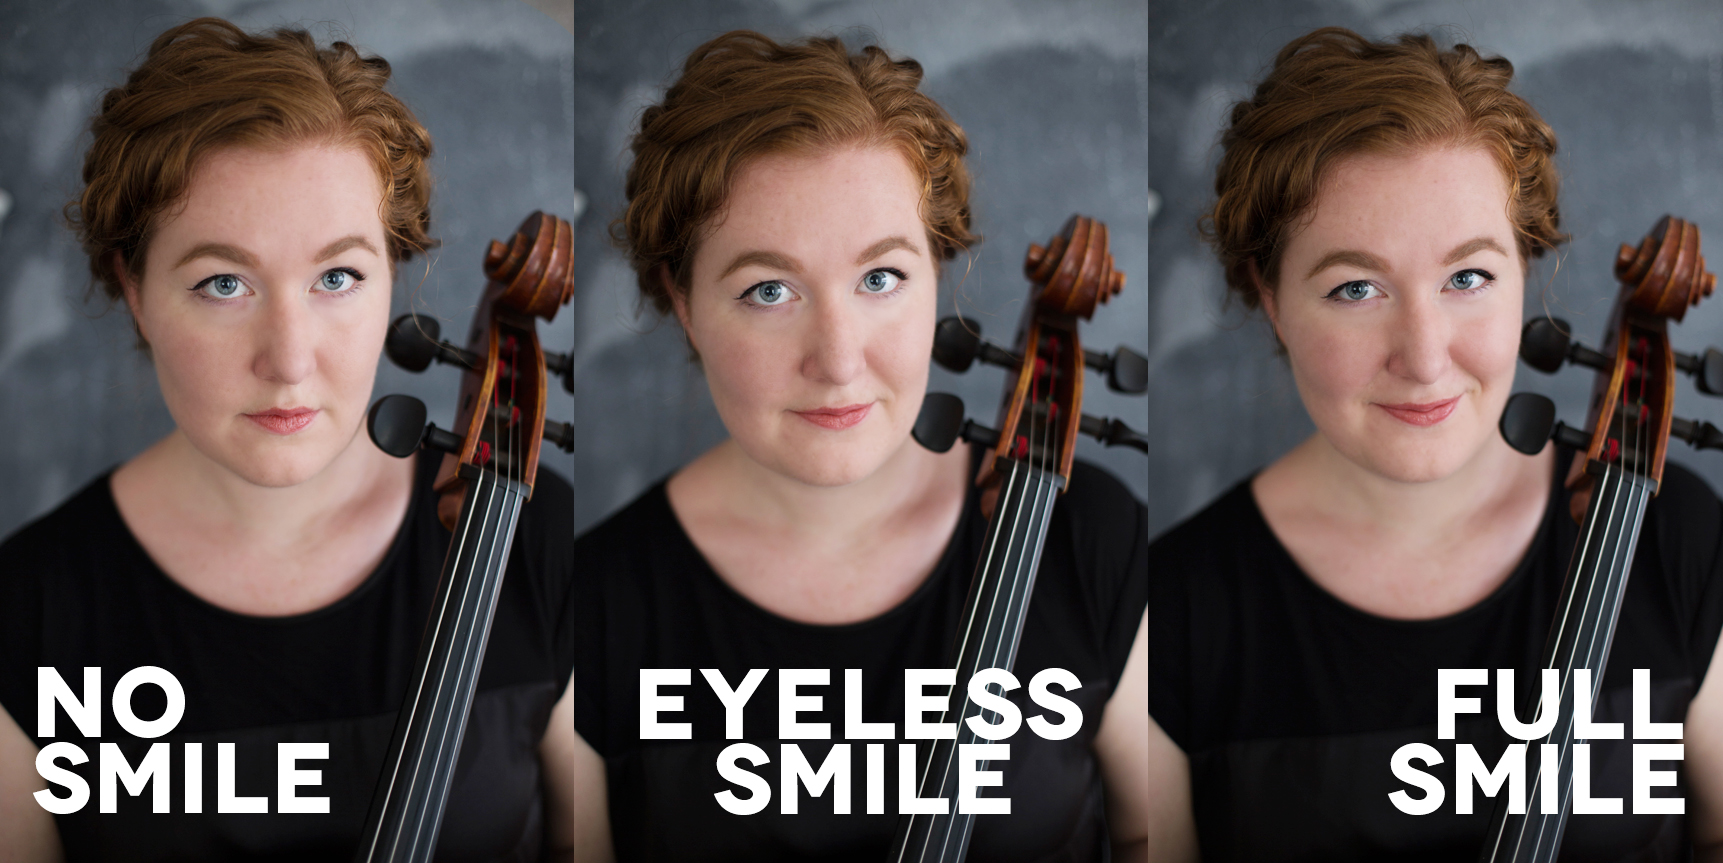
(click photo to view a larger version)

5. Consider Your Instrument: The advantage of showing your instrument is that viewers can immediately know what you do. BUT, be sure to maintain nice posture if you play in your photos. Sometimes that means playing an easy scale or miming your technique. Take care, because moments of transition while you play (maybe between a shift or during a breath) can result in distorted pictures with awkward posture.


(Photo from Shutterstock.com | Photo by the amazing Kaitlin Moreno)

6. Use Natural Light: While many professional headshots are taken indoors, the success of these photos is a result of professional lighting and professional level photography. For the rest of us mere mortals, natural light will greatly improve our chances for beautiful photos. Avoid direct sunlight because it can cause harsh shadows (plus, you'll be all squinty). Try to take your photos during the golden hour for best results.

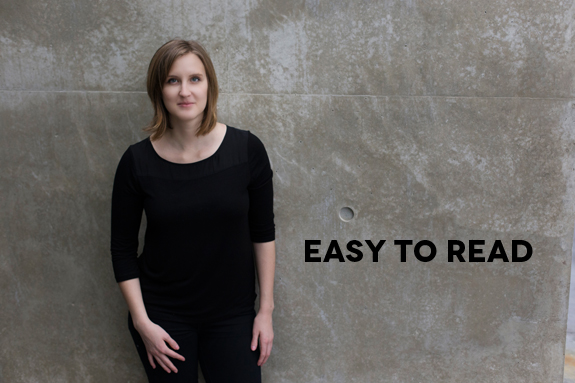
7. Background Care: Busy backgrounds are bad for text. If you plan to add text to your photo, try to find an interesting, but simple background.

Hard to Read BackgroundEasy to Read Background

8. Account for Black and White: If you plan on using your headshot for concert programs, remember, programs aren't all printed in color! In fact, usually they're not. While color photos look best with well... nice colors, black and white photos look best based on contrast. Busy or low contrast areas in your photo might not look as good in black and white.

Color and Black and White
(Hover to See Black & White Version | Color photo by the amazing Kaitlin Moreno)

9. Take a Million Photos: I can't emphasize this one enough. Since digital photos are basically free, take as many as you can stand and weed out the bad ones later. You're much more likely to get "The Shot" if you have lots of options to choose from.

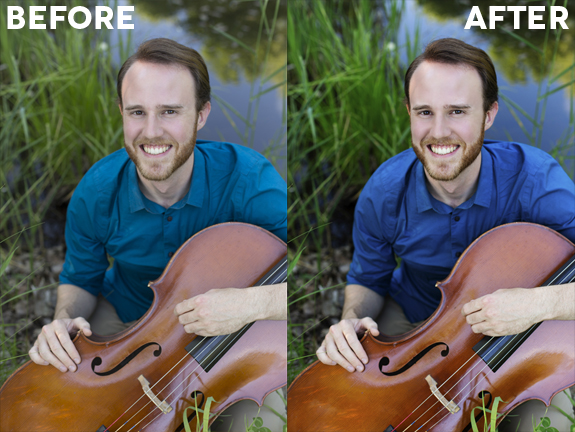
10. Edit Your Photos: The reality is, every professional photo you see has been edited at least a little. Though starting with a well lit photo with sharp focus is key, adding more contrast and saturation will make a huge difference for your pictures. Editing software ranges from free (try Picasa) to very expensive (Photoshop is extremely powerful) to somewhere in between (Afterlight is a great iPhone app and Pixelmator is like Photoshop light).

Before After Edit Headshots

The world of photography is unbelievably expansive - I mean, it is it's own artform - and it can be easy to get overwhelmed. Frankly, that's why professional photographers are worth every penny they charge! But, with some effort, it is possible to do it yourself.

If you have any questions or advice to add, feel free to leave them in the comments section below!

All photos in this post were taken by Jennifer Bewerse unless otherwise noted. Special thanks to Rachel Beetz, Dustin Donahue, and Bryan Hayslett for agreeing to make photo appearances for this post!

15.7.14

Creative Ideas: Elizabeth Gilbert

In some corner of an internet rabbit hole, I came across this video, a TED Talk by Elizabeth Gilbert. While it flew in the face of many of my beliefs, it also opened a few possible venues of thought that I found fascinating and inspiring.

So today, I'm attaching my thoughts to this video. Give it a look and then let's chat...


I believe in the power of people. In fact, the entire reason I play music is to connect with people. A wonder-filled moment of sensing truth or an "Aha!" flash of understanding from the audience fuel my artistry. These aren't otherworldly experiences, they are deeply human.

So you can imagine how hesitant I am to pass these gifts over to some kind of spirit.

However, Elizabeth makes a compelling argument. I have absolutely and repeatedly found myself in the position of questioning whether I can bear my failures - an unavoidable part of the artistic process - or whether pouring myself into something so abstract, subjective, and elusive is just asking for a life of insecurity or disappointment.

I have felt the divine inspiration Elizabeth describes, and I've performed concerts where I just can't seem to find my flow. This tantalizing "divine wonderment" seems to have only the bare minimum relationship to preparation. (Obviously the divine inspiration can't even be accessed if one isn't completely prepared.)

Often times, the industry-standard response to such insecurities is to "toughen up," to close off the part of yourself that is vulnerable to caring about how your work affects the world. But, that vulnerability is essential to my entire reason for creating. To cut out that vulnerability is to sever the lines of authenticity and empathy that catalyze the most intense experiences music has to offer.


Maybe then, Elizabeth's strategy offers a nice psychological tool for creating that little bit of cushion necessary to be completely vulnerable and still survive the darkest moments of living a creative life.

25.6.14

Why I Don't Want to Expose Audiences to Classical Music

Have you ever suddenly become hyper-aware of a word then hear it everywhere? With me, it’s usually the word “like” (which I use far too much as an obnoxious substitute for “um"), but recently the word “exposed” has been hot on my radar.


As presenters in the classical music world, we’ve all said it - we're going to expose someone to classical music. It’s a very convenient way to describe the process of discovery we hope all of our audiences will have.


The thing is, most uses for the word “expose” are negative. It connotes nakedness, uncomfortable vulnerability, unfamiliarity, and bad behavior.

…exposed to the elements…
…exposing a terrible truth…

I know we’re all using “exposed" positively when we talk about music, and it’s true, exposing someone to some kind of knowledge is a completely valid and recognized use of the word. But when we look at the definitions of "expose," its positive meaning is buried among "unprotected," "indecently," or "objectionable."


I think it’s safe to say most musicians don't want their audiences exposed in these ways. But unfortunately, the word is loaded with negative connotations and evokes justifiable feelings of resistance.

Even in the best scenarios, the word feels like a chore or an obligation. Do you imagine being exposed to something to be delightful or just somehow necessary? The "eat your vegetables" mentality is partially caused because "exposure" indicates a total separateness between a person and the thing to which they are being exposed. Rather than uniting someone with their cultural birthright, exposing someone to music sounds foreign and uncomfortable.

Another curious result of using the word “expose” when describing musical experiences is that it negates the active role of listeners. While it can sometimes seem passive, listening to music is an action - absorbing, synthesising, and attempting to understand. The best audience members are anything but passive! Being exposed to something is a passive act during which something is shown to you. Exposure is done to you, not with you.

I propose our role is to share, to facilitate discovery, to reveal.

So much more than near-synonyms, these are words that actually reflect the act of musicking that occurs between a performer and audience member.


As musicians, we spend most of our time working in the realm where words end. But, when we're not performing, words matter. They shape so many of the ways we interact with and, as a result, interpret the world around us.

We have a responsibility to choose our words with care.

So how about it? Let’s all take a look at our mission statements, grant applications, and concert proposals. Let’s check on the words we use when discussing audience development, outreach, program notes, and when speaking to audiences.

There’s no need to expose classical music to that word any more.

11.6.14

Score Binding Basics

These days 90% of my performance parts are PDFs printed on my home printer. Unlike beautiful Urtext scores, these loose leafs are hardly stage-worthy. Over the years I've gotten very accustomed to binding these scores myself.

My former teacher, Ronda Rider, calls it "New Music Arts and Crafts". Obviously, she is the best.


Why tape your pages together? Loose leafs on stage are a risky proposition. All it takes is one wrong page shift, a wobbly stand, or an over-zealous air conditioning unit and you're spilling sheet music all over the stage in a not-quite-performance-art kind of way.

Some musicians manage to tape their pages together but don't bind them into a booklet. Have you ever seen the accordion-style spill of music off a stand? It's not pretty and there's no elegant way to recover on stage.

So, for the sake of getting through the concert in one piece...

How to Bind Your Score: Basic Method

Supplies: music, strong matte (non-shiny) tape


1. Tape all of your pages left/right sides together so the piece is one long row of pages. Leave a small gap between the pages as you tape them. Avoid putting tape where you might like to write notes in the future. Pencil doesn't stick well to tape.


2. Fold your music accordion-style to create an unbound book. Now is the time to check your page turns. Did you get the pages in the right order?


3. With the accordion of pages collapsed down to a stack of papers, turn the soon-to-be spine of your score towards you.


4. Gently separate a set of two page-pairs (the points where you already taped the pages together) and bind them together with a piece of tape perpendicular to the pages.


5. Continue to tape these pairs until there are none left.


6. Now tape the pairs into pairs.


7. Repeat until all of your pages are taped together.

At first your music is going to be a little... voluminous... the tape needs time to get broken in. It's a good idea to tape your music as soon as you get it so you have plenty of time to get comfortable with the new set up.


If the piece you're learning is very long (say more than 15 pages) it might be worth having it printed double sided on nice paper and bound professionally. This Basic Method of binding scores doesn't work well if the score gets too think.

There you have it, a basic plan of attack for binding your music. Of course, there are other fancy ways of binding that include third page fold-outs, blank pages for page turns, and tricks that begin to compete with pop-up-book artists, but in due time... mastering the basic method is an important first step.

Does anyone have any particular type of tape their in love with? I usually use regular ole' scotch tape, but I've seen some nice results with masking tape. Do share...