13.8.14

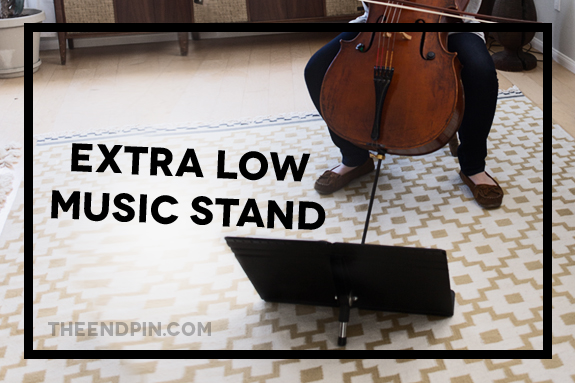
Extra Low Music Stand

Low Stand Title

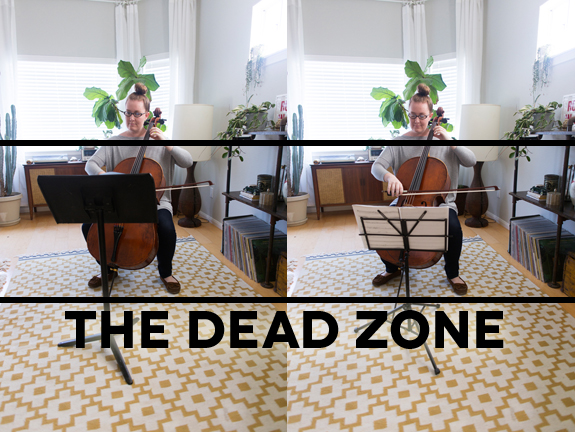
One of my great enduring struggles as a cellist has been the traditional music stand. Yes, it holds my music very well, but it also creates a giant blockade. Meet the Dead Zone.

low stand

I hate the dead zone. It visually (and to a lesser extent acoustically) blocks all of the most interesting sounds the cello can make! So while learning Lachenmann's Pression, which specifically requires the cellist/cello to be visible, I began a quest for the perfect low music stand. And I found it.

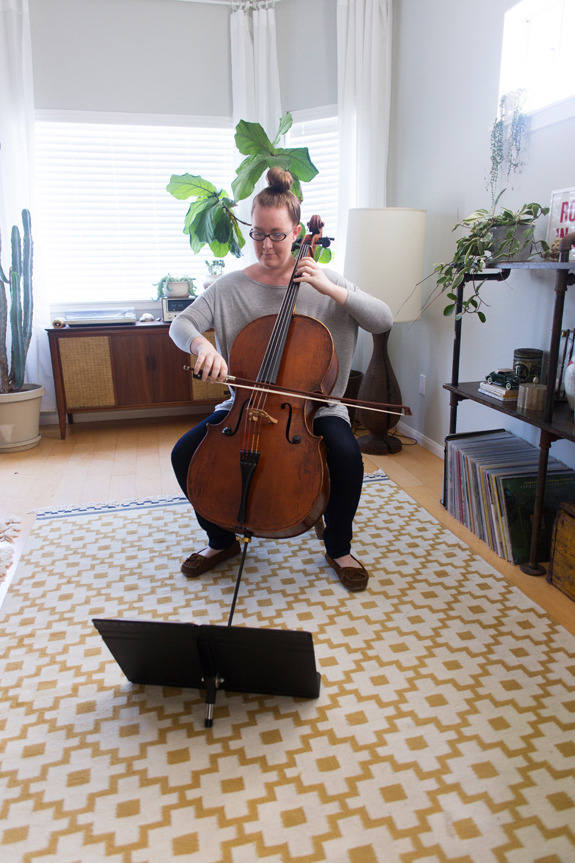
low stand_2

Pictured above is a Manhasset Table Top Stand, which, it just so happens, also works very well on the floor. The stand is stable, looks nice, and is completely unobtrusive.

In the interest of full disclosure, there are three downsides to a stand this low:
1) you have to know the piece well and have good enough vision for the distance
2) it's difficult to see collaborators (ie conductors or chamber music partners)
3) page turns are difficult at that distance

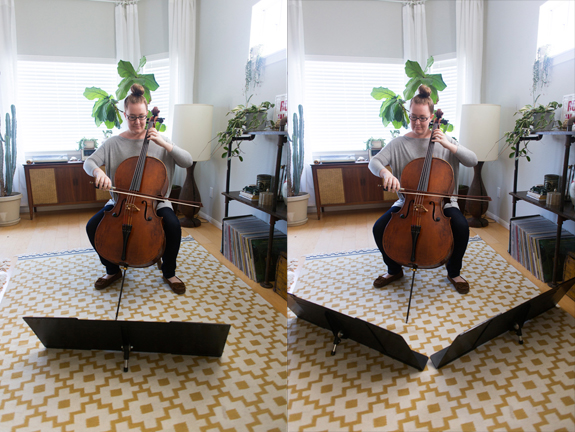
But if you add Stand-Out stand extenders, you should have no problem fitting your music without needing page turns.

low stand expanded

With extenders, you can easily fit 8 pages of music (probably more if you consider your page size carefully). When collapsed, two stands with their extenders fit in carry-on luggage and can be held with one hand.


All together the two stands and extenders will run you about $90. There are cheaper options out there, but I haven't found anything that's as durable, nice looking, and easy to transport.

Cellists, get excited.

7.8.14

DIY Concert Posters

Poster Title

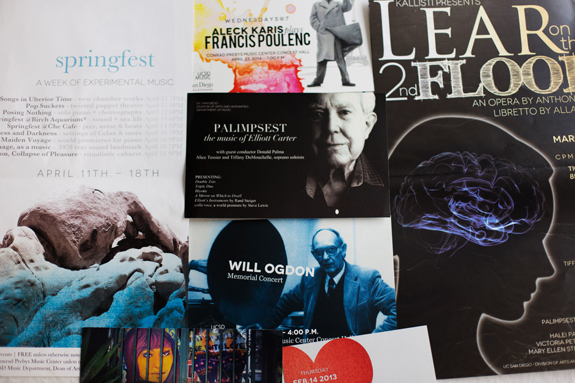
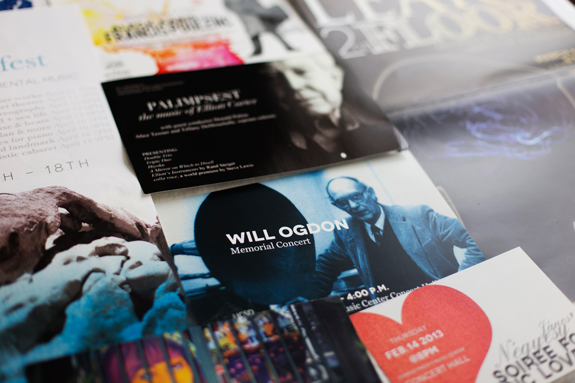
Over the past two years, I've been in full-on visual promotions mode as the Productions Research Assistant for the UC San Diego Music Department. Basically my job has been to make digital and printable posters/flyers.

Do it yourself promotions are actually pretty darn easy, but the learning curve for poster printing basics can be pretty confusing. So, from someone who's been through it (often the hard way), here are the printing basics you need to make your own professional looking posters.

Posters copy_1

*Parts of this post assume access to some kind of image-making software like Pixelmator or Photoshop

1. Image Resolution: When creating your poster image for print, always set your resolution to 300ppi (pixels per inch). That's the standard resolution for print. Resolution for digital posters (images online) can be 72ppi, a much lower resolution.

2. Paper Size: While 8.5x11 paper is the easiest to do yourself, using 8.5x14 or 11x17 paper will give you a more custom (and thus more professional) looking poster. I almost always make my posters on 8.5x14 paper, then get them printed at a local office supply store on a laser printer with nice quality paper.

rgb cmyk

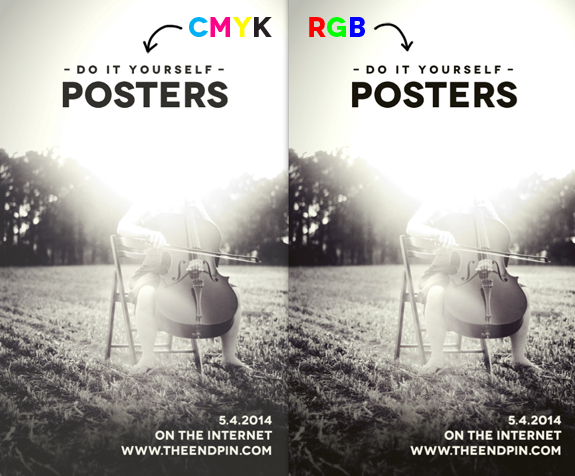
3. CMYK vs RGB: Printed images should always be made using CMYK color settings - pigment based colors that will translate to printers with high fidelity. Digital pictures should use RGB settings, which are colors based on light. If you mix up the two color settings, you'll get images that don't look how you intended them. For example, in the photo above you can see how a CMYK image looks faded compared to an RGB image when viewed on your computer screen.

Posters_5_1

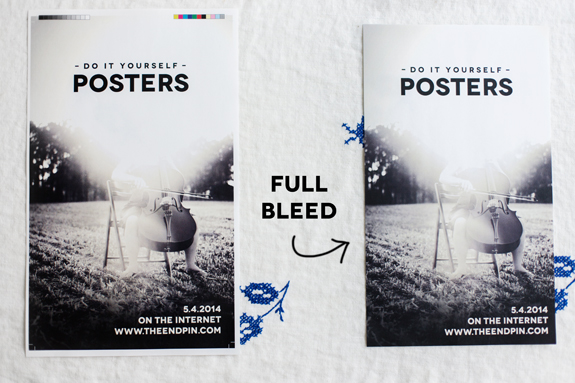
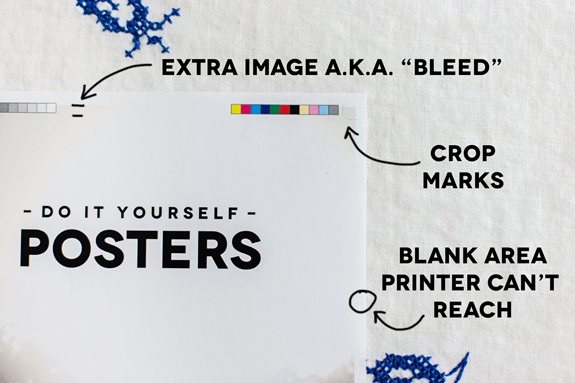
4. Full Bleed: When an image goes all the way to the edge of the paper it's called "full bleed." Full bleed is a kind of illusion because printers can't actually print to the edge of paper! To get the full bleed effect, you have to incorporate extra image around the perimeter of your design, called the bleed, then crop your poster.

Posters_6_1

As a general rule, always add 0.25 inches of bleed to your design, then use a paper cutter to cut off the excess edge. If you have a program like InDesign, you can even add crop marks to show you exactly where to cut.

5. Image Rights: When you're making a poster, it can be tempting to grab the first great image you see off of a google image search, but that image doesn't belong to you. Always get permission to use another artist's image, or better yet, make your own!

Posters_1 copy_1

It might all seem like overly complicated jargon at first, but these basics can become second nature in no time. Depending on the software you use, solutions and tutorials are usually just a web search away. In the end, it's pretty simple to up your promotions game and get butts in your concert seats.

30.7.14

The Gigging Triangle

Gigs. If you're a working musician (or most any creative for that matter), gigs are probably a significant source of your income and career. As a result, we've all taken gigs that were soul-sucking, felt like a waste of our talents, or even ones that ended up costing more than they paid.

Gig Triangle

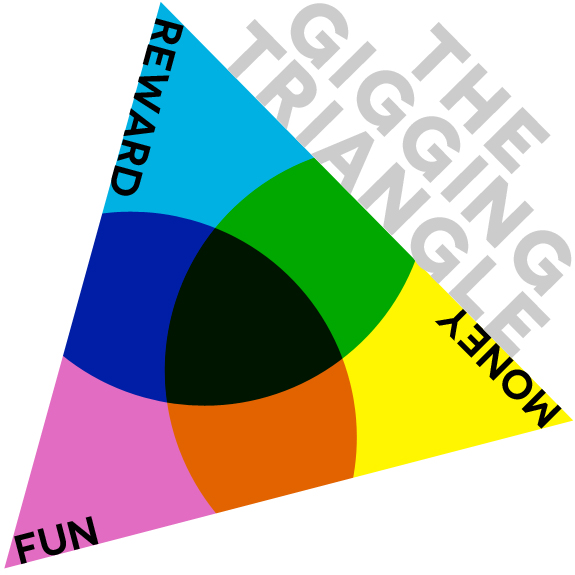
The Gigging Triangle is basically a tool that uses three gig characteristics to help avoid those soul-sucking-waste-of-talent-costing-me-money gigs that, over time, cause more harm than good.

Break It Down

1. Money: Probably one of the most concrete parts of the triangle - does it pay? Always remember to include costs in this calculation! Will you be missing other gigs? Travel costs? Will the time you spend on this project be more profitable if you spend it doing something else?
2. Fun: Maybe it's colleagues you love or an activity you can't get enough of - this part of the triangle includes anything that just makes you happy. I suggest "subtracting" from this category if the gig includes activities you specifically hate.
3. Reward: This is probably the most personal, abstract, and, frankly, tricky category on the triangle. Rewards can either be artistic or career related, will be different for everyone, and will change during different points of your career. Examples might be performing a piece you've always wanted to learn, getting reviewed, working with an important person in your field, or playing in an important venue.

While we can all survive a bad gig every once in a while, the reality is that working for just money, just fun, or just reward isn't sustainable. Also true, unfortunately, is that dream gigs (the ones that are fun, rewarding, and pay) can be pretty rare.

The gigging triangle is about making sustainable decisions, not perfect ones. The goal is to only take gigs that fulfill at least two of the three categories.


Four Scenarios:

1. Money + Fun + Reward = You are super lucky! Take the job and hang onto it with your life!
2. Money + Fun = Might not be the most satisfying job in the world, but it will pay the bills and make you laugh.
3. Money + Reward = It might be a bit of a slog, but you'll make your rent and build career capital.
4. Reward + Fun = You'll have a great time and progress your career, it's not going to pay the bills, but still a good investment!

I've been trying out this method for about a year, and, while I've definitely still taken several gigs that didn't work out well, I'm taking fewer gigs for money desperation or because I think I "should," and I'm saving my time for the work that will sustain my career. I'll take the progress.

The Gigging Triangle will never be an ideal predictor for the perfect gig, but it is an excellent tool for learning about what works and doesn't so we can make better choices in the future.

But it's just one method! How do you decide which gigs to take?

22.7.14

10 Tips for DIY Headshots

One of my top goals as a working musician is to learn skills that give me financial and artistic independence. I don't always have tons of money, but I have plenty of elbow grease!
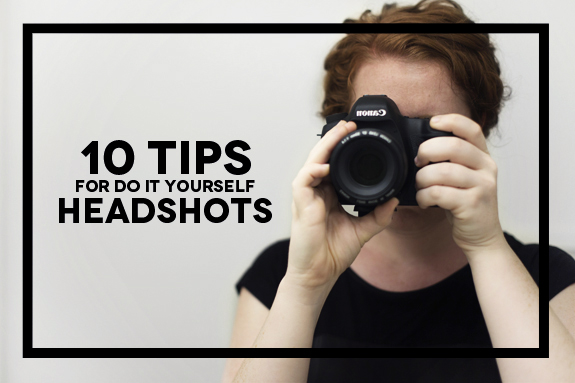


Photography is one area that I've invested a lot of time into. In an attempt to pass along some of the most important things I've learned, here are 10 tips to help take better DIY headshots.

1. Plan How You'll Use Your Photos: Posters? Business Cards? Headshots? Each of these traditionally require a different type of photo. For example, posters are portrait orientation including negative space for text, business cards and postcards are landscape orientation including negative space for text, and headshots are portrait or square orientation and should feature you and your instrument.


Knowing how you'll use your photos will allow you to plan your shots to have all of the necessary layouts to meet your goals.

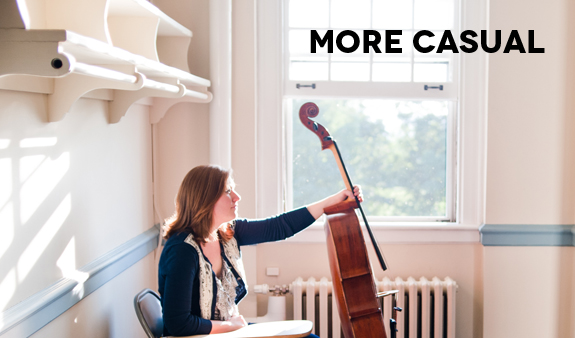
2. Find Your Mood: All of the elements that go into your photo - what you wear, the lighting you use, where you are, the expression on your face - are for more than looking good; they all come together to create the mood of your photo. Deciding how you want the photo to feel can guide your decisions, so your photo can reflect who you are as an artist and what your work is like.
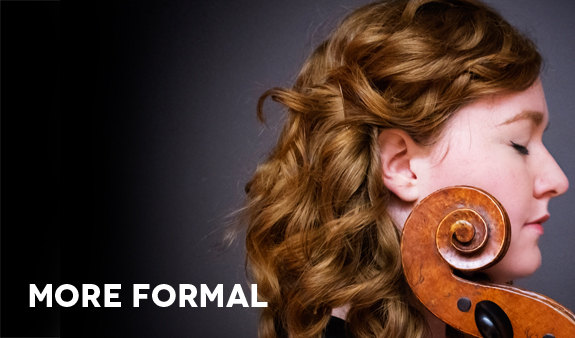
Formal Photo
Casual Photo
(Bottom photo by the amazing Kaitlin Moreno)

3. Photography Equipment: If you're a beginner to photography the two most important pieces of equipment you will need are 1) a camera with the highest resolution you have access to and 2) a tripod or friend to take your photos.

Resolution is important because it will limit how you can use your photos. If you only need your photos for internet use, you can get away with lower resolution, but, if you'd like to print concert posters, you will need a higher resolution camera.
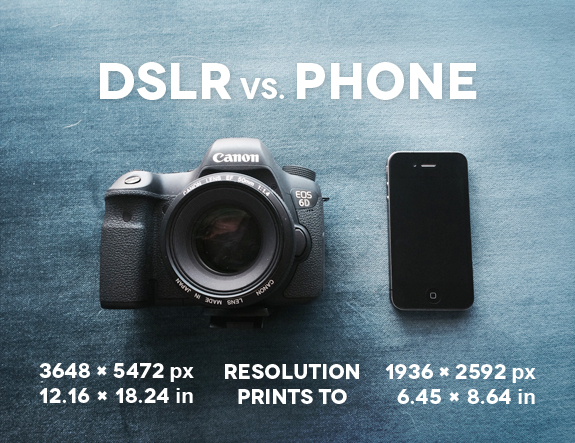
Equipment

Obviously, expensive equipment can yield gorgeous results, but phone cameras and point-and-shoot cameras have improved tremendously over the years! The easiest/most affordable solution is to have a good friend take your photos with a point-and-shoot camera or your phone camera.

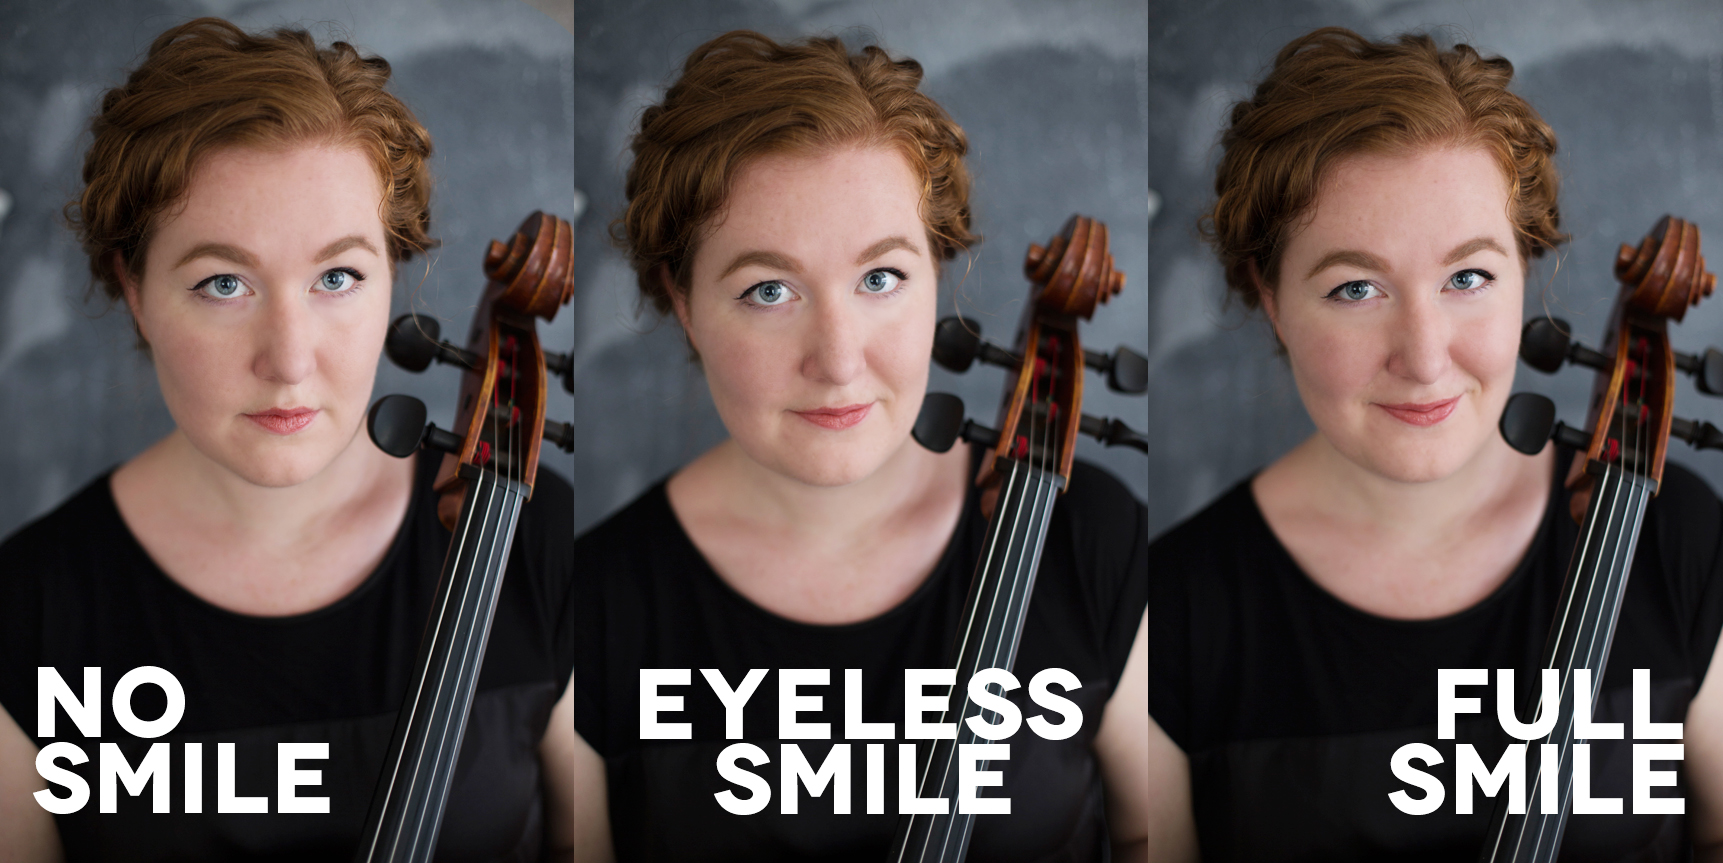
4. Experiment With Smiling: Not everyone looks best while smiling. Give yourself some options by taking photos with and without a smile. Remember, if you DO smile, avoid an awkward yearbook look by always smiling with your eyes too!
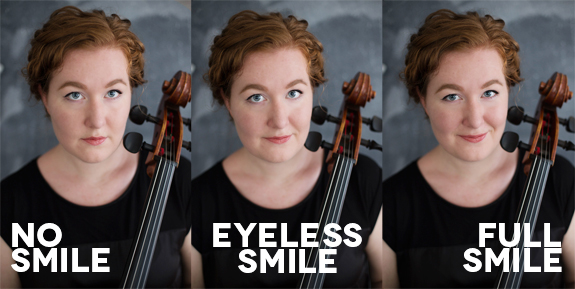
Smile Chart
(click photo to view a larger version)

5. Consider Your Instrument: The advantage of showing your instrument is that viewers can immediately know what you do. BUT, be sure to maintain nice posture if you play in your photos. Sometimes that means playing an easy scale or miming your technique. Take care, because moments of transition while you play (maybe between a shift or during a breath) can result in distorted pictures with awkward posture.


(Photo from Shutterstock.com | Photo by the amazing Kaitlin Moreno)

6. Use Natural Light: While many professional headshots are taken indoors, the success of these photos is a result of professional lighting and professional level photography. For the rest of us mere mortals, natural light will greatly improve our chances for beautiful photos. Avoid direct sunlight because it can cause harsh shadows (plus, you'll be all squinty). Try to take your photos during the golden hour for best results.

7. Background Care: Busy backgrounds are bad for text. If you plan to add text to your photo, try to find an interesting, but simple background.
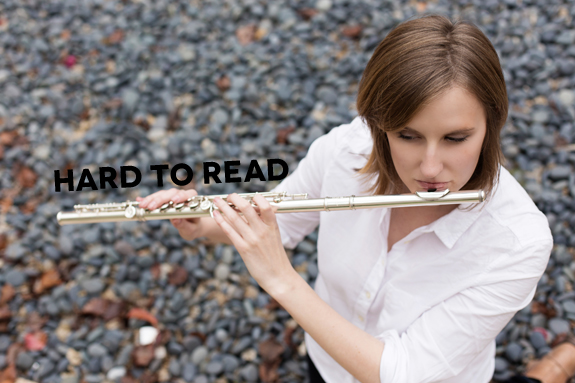
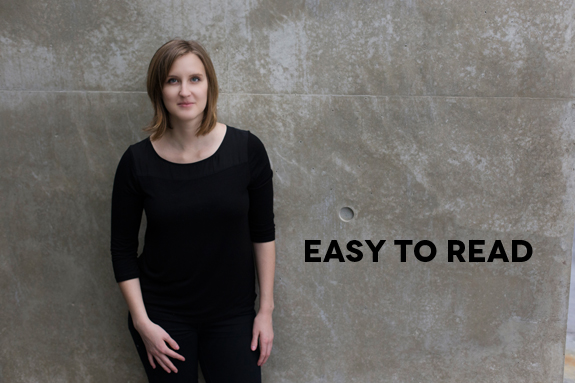
Hard to Read BackgroundEasy to Read Background

8. Account for Black and White: If you plan on using your headshot for concert programs, remember, programs aren't all printed in color! In fact, usually they're not. While color photos look best with well... nice colors, black and white photos look best based on contrast. Busy or low contrast areas in your photo might not look as good in black and white.
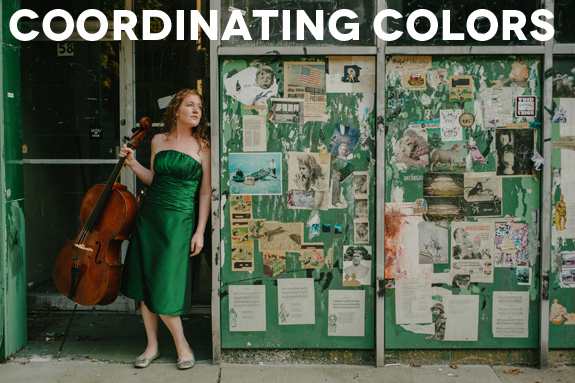
Color and Black and White
(Hover to See Black & White Version | Color photo by the amazing Kaitlin Moreno)

9. Take a Million Photos: I can't emphasize this one enough. Since digital photos are basically free, take as many as you can stand and weed out the bad ones later. You're much more likely to get "The Shot" if you have lots of options to choose from.

10. Edit Your Photos: The reality is, every professional photo you see has been edited at least a little. Though starting with a well lit photo with sharp focus is key, adding more contrast and saturation will make a huge difference for your pictures. Editing software ranges from free (try Picasa) to very expensive (Photoshop is extremely powerful) to somewhere in between (Afterlight is a great iPhone app and Pixelmator is like Photoshop light).
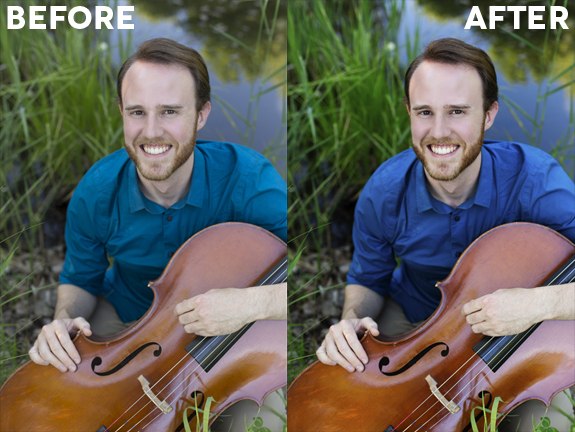
Before After Edit Headshots

The world of photography is unbelievably expansive - I mean, it is it's own artform - and it can be easy to get overwhelmed. Frankly, that's why professional photographers are worth every penny they charge! But, with some effort, it is possible to do it yourself.

If you have any questions or advice to add, feel free to leave them in the comments section below!

All photos in this post were taken by Jennifer Bewerse unless otherwise noted. Special thanks to Rachel Beetz, Dustin Donahue, and Bryan Hayslett for agreeing to make photo appearances for this post!